Sunday, October 7, 2012

Easy Room Updo-Lighting Fixtures


So one of the things that can bring an impact to a room, for very inexpensive is a lighting fixture replacement.  With a bit of paint and a new shade or sconce you can switch things up and make something that is inexpensive look lux for a few bucks. For example; this table lamp, I was in love when I bought the pair for $25 at a furniture store liquidation.  Fast forward five years and I got tired of having to polish the lamps and hand wash the shade.


After a few coats of oil rubbed bronze paint and a new shade, the lamps make a bolder statement than the chrome and white shade look.
As you can see, looks much better and blends in with the cherry end table and blue palette that is in the room.  I also used the oil rubbed bronze on many other items such as a few more fixtures and patio furniture.  I was able to pick up quite a few fixtures from thrift stores and garage sales.  Some were left in the house and I just up-cycled and repurposed them.  In the dining room was a relic from the past in bronze (most of the lights were relics from the past) and glass.

As you can see, it is just there and does not really make the statement that I wanted.  We replaced it with this light I was able to pick up from the thrift store for $15.
It was originally a oiled bronze color, but I repainted it to give it a fresh coat.  I was able to find the sconces separately on another thrift store run for $3 a piece.  All in all the fixture cost me $35.  I am rounding up to include the $2 ceiling medallion that we picked up to cover up the hole in the ceiling since this fixture does not do a flush mount.  When we were picking up the medallion I saw that fixtures like this cost anywhere from $90-$325 brand new.  We took the original dining room light an placed it in the kitchen after a quick fix.  Here is what was originally in the kitchen.
It made the whole kitchen dark and I hate cooking in the dark.  I painted the old dining room fixture with the oil rubbed bronzed to keep the look uniform and discovered that I could turn the arms upwards.  After new clear glass sconces that cost around $4 a piece, here is the new version of the old dining room light.

And so you don't have to scroll up here is the before again.


Night and day difference.  We also put the kitchen light on a dimmer so I can adjust the lights as needed.  Oh and we are painting the ceiling and adding medallions to most the chandlers, someday....  I did not stop there with the fixtures, you could say I was fixated upon fixtures for a while.  In the bathroom we had the old 1980s looking vanity lights with the large bulbs.
I am not really a fan of bright harsh lighting and really wanted to put to use this vanity light I found with sconces at the thrift store for $10.

The picture is a bit dark, sorry, but you can see the lights give the room a different look even without changing out the mirror.  I did not have to paint this fixture, so I was really glad about that.  In the master bedroom there was this huge fan that I really did not want to sleep under.  It would be like sleeping under a helicopter propeller.  So we moved it downstairs to Josh's Man Cave.  And it looks 10 times better down there and helps to circulate the heat upstairs when we have the wood stove going.
While we were changing out that fixture we also updated the fixture near the bar.  I found these two pendant lights for $5 a piece and the sconces for $2 a piece, but so far have only been able to use one.
Prior to being there in the Man Cave and in the hallway was this lovely gem.

The hallway was replaced with a flush mount that we broke down and purchased from the home improvement store for $20 for two.

It also went into the guest room to replace this.
We placed a similar light like the dome in the hallway and guest room in Liam's room, but his is white.  That one I was able to pick up at the thrift store for $2.  But my favorite piece is the one that replaced the monster fan in our bedroom.
This one I got from a yard sale for $3 including the sconces.  With our room being a combination of chocolate browns and slate blues with heavy mahogany furniture, having a bit of feminine whimsy helps.  We also replaced the same boring old grandma light...
That was in our walk-in closet with a really cool, what started out as a hanging light, that I picked up for $6 from the thrift store.
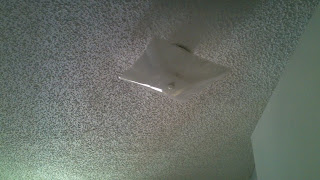
Not only does it make the closet look a bit more modern, but it gives off better light.  It is very easy to replace a lighting fixture, you might want to read up on it first before you start though.  Luckily I have a husband who dabbled a bit as an electrician before enlisting and he has taught me quite a bit.  If I can do it, trust me you can do it.  Just make sure to switch the breakers before you start though.  And even thought he has replaced just about every light fixture in this house, Josh does agree that it makes the whole house look better.  So next time you are out there thrift shopping, don't hesitate to browse the lighting fixtures area.  You might finds something that will change your whole room for less than you think.

Happy Re-Mollying!
Molly


Football Season

It is truly amazing how much time can be wasted, sometimes worth it though, watching football while there are chairs to be sanded and stained, stairs to be carpeted, lighting fixtures to be installed, etc.  Thank the Gods for this Four Day that we had.  We were able to get the chairs sanded and stained (going to reupholster them tonight), stairs carpeted and didn't even kill each other.  Granted I have a lot left on my list of must dos before the Holidays set in, but it feels good to get the stairs and chairs done.  Now it is on to the light fixtures, kitchen pendant and outdoor lights, as well as the board and batten in the dining room, bead board in the bathroom, trim in the guest bedroom (as well as the curtain holdbacks), and just life itself.  And as much as I love seeing my Irish and my Vikings winning this season, for the first time I am starting to feel like a football widow who needs to get the house done for parties.


Molly 

Tuesday, September 18, 2012

Filecabinet/Bench UpCycle

So we had this large freestanding wooden filing cabinet given to us by a friend.  Having no clue what to do with it, it had various uses in the old house.  The drawer that held the files was broken off so it was just a large wooden box on legs.  After moving we face the common conundrum of finding a place for all the furniture.  Since the thing was taking up too much space and I had a free weekend (Josh was in the field) I came up with the somewhat ingenious plan of turning it into a bench for at the foot of our bed.  WARNING: Have a plan first, unless you like to aggravate yourself and burn out your husband's rechargeable battery for his drill.  I had to buy him a new one soon after.  Here is the best before picture I could find of the box with legs, I got so excited that I forgot to take some pictures during the process.

I started out by unscrewing everything within the reach of the drill.  I figured that I wanted to get rid of the three sides and use the top for the cushion.
Here are the pieces that I stuck with.  As you can see it is a lower to the ground bench, but it is perfect for Josh to take his boots off after work and to allow Liam to crawl into bed with us.  After I tore it apart it was time to put it back together with the fabric that I chose.
It was actually a bedskirt that I found at the Goodwill for $5 and I just dyed it to match our bedding as best as possible.  I measured out three sections that matched up and then sewed them together. 
After they were connected, I stapled the edges to the underside of the top of the file cabinet leaving room for the stuffing that I would use for the cushion.
 After I went through a few times of stapling it the right way, I had to redo it because I forgot to remove some of the trim on the top, I stuffed it full with as much batting as I could.  Once it was stuffed, and Josh was home by this time, we went about tufting the cushion.  As you can see there is some variation in the coloring of the material from dying it.  I didn't mind it too much, but if you are picky you can always spend longer to dye it how you like.
Josh is drilling screws into the cushion to tuft it.  I would recommend not doing this, but hammer nails in instead.  We just figured that screws would work just as well and faster, but it tears up the material a bit.
Here is Josh sitting on it to make sure that no screws that connected the top to the bottom came up and stuck him in the butt.  He is such a good guinea pig for me.  All in all, I wish I had directions when making the bench, but my failure can be used for your success.  I would have also used a material that I had more of so I could do one piece of fabric rather than three.  I also would have used more batting as well as nails for the tufting.  Here is the finished product (that may be redone in the near future).
As you can see, it compliments our bedding and bedroom.  But I am not 100% happy with it.  Maybe once things slow down a bit I can redo it and update this with a better looking bench.  But in all the project cost us $20 all together, $5 for the material, $10 for the batting and $5 for the dye.  I guess this also shows you what you can do with those free or handed down pieces of furniture that you have no clue what to do with.

Happy Re-mollying!
Molly


Monday, September 17, 2012

End Table Redo

So it has taken me awhile to post this due to the flu hitting our house pretty hard.  I was finally able to finish last night.  These end tables we bought at a garage sale for $20.  I loved the look, just not the stain.  I used the General Finishes Gel Stain Georgian Cherry on them and I think they turned out great.  Here is the before.


 After cleaning the table off, they were in the garage for a bit collecting dust while I worked on other projects.  I was working up the energy to sand them, but with the gel stain I did not need to.  I removed the drawer and legs and started on the base.
I love this stain, look at just one coat.  Although I did not go all the way to the end of the base. I wanted to see what it looked like and was so excited that I went ahead and took the picture.

 Here is the table, drawer and legs after one coat.  I think it looks pretty good with the darker cherry stain rather than the light wood look.
Unfortunately, Liam decided that while it dried it needed his footprints on the top of the base, so I had to add one more coat on the top.  But here is the finished product.
I used the foam brush technique, it put the stain on more smoothly and evenly than a rag or sock did.  The sock method is great for unfinished wood, not really for wood that has a coat of poly on it.  It took me a few days to do because the flu hit us and then the added bonus of wee footprints in the stain.  But it was a fun project. Here is the before and after of the tables.

I think the cherry makes the tables look richer in color and more "antique".The total cost of this product was around $45.  $20 for the tables, $20 for the stain and $5 for a large pack of foam brushes.  I'm telling you this stain is the best, even to just have around the house for quick projects.


Happy Re-mollying!
Molly


Tuesday, September 4, 2012

New Look

Yup, updated the look of the blog.  I figured since the holidays are approaching I would keep the background generic and switch it out according to the holiday, or my mood.  I did have a blast with the header though.  Things has slowed down just a bit here at the Lyonsden, Northwest edition.  Now that my workbench is built it is just a matter of moving all my craft and project gear downstairs and putting it all away.  Only problem is that I have also been buying more with the holidays approaching and my thinking I'm crafty enough to make all the presents.  My next big project is to make little man Liam a play table for upstairs.  I am trying to curb his wanting to color on the walls with sitting him down at a table.  Let's just hope that I can convince Josh to make it or help me make it.  I am also looking forward to making table runners for my relatives who celebrate Christmas.  When I come home, packages in hand, Josh just shakes his head in wonder.  To all the men out there, never let your wife/girlfriend hit up craft stores on Labor Day when they have 50% sales.  Speaking of packages, I am not so patiently awaiting my remaining gel stains from Amazon so I can finish the floors as well as start my refinishing of two end tables, seven dining chairs, as well as our flooring upstairs.  I am really looking forward to getting rid of the light colored wood.  I will be posting pictures of the before and afters of the projects.  I also will be posting the before and afters of the different rooms as we finished them.


Happy Re-mollying!
Molly

Friday, August 31, 2012

Main bath vanity redo

So to begin I hate lighter colored wood.  Unfortunately the home we bought is filled with light colored wood.  From the main bathroom, to the kitchen, to the wood flooring...all light colored wood.  I, myself am a dark cherry, mahogany, sometimes walnut kinda girl.  Its all about the dark woods, jeweled tones, Queen Anne style and damask patterns.  So buying the house with the light colored wood was a large leap for me.  At first I was upset that we would not be able to replace the floors for a few years, I knew the replacing/repainting of the cabinets in the bathroom and kitchen would be more realistic so I was not upset about that.  Then I found this pin on Pinterest...this woman is a savior. Her blog is also really great.  She introduced me to General Finishes Gel Stain.  Here is her link.   And here is my before and after.

She suggests the use of a sock.  I however found that it goes on much smoother and covers more in one coat when using a foam brush or a microfiber roller brush.  It took me less time (I started at 1130 this morning and I was finished in a less than six hours, not to mention all the time I spent doing errands and other projects while it dried) and I did not need to do continual coats, just two all together.  I also chose not to add the poly, I am not a fan of shiny furniture.  I also tested it on a scrap piece of flooring we had in the garage and guess what...it stained the ugly light wood a nice walnut.  So I bought the cherry in the quart size.  The Java color that I bought was 1/2 a pint and it covered not only the bath vanity, but I also have enough left over for the beadboard that we are going to put up in the main bath.  This stuff is amazing and can be addictive with all that you can transform. 

Happy Re-mollying!
Molly

Dessert Dishes Project

So I have been seeing on Pinterest different ways to personalize Dollar Tree pottery.  I hopped right on this bandwagon because its a cheap, yet fun craft.  I bought at first 4 plates with the intention of personalizing them with a cursive "L".  They looked pretty bad. so I took some stencils and colored sharpies and went to town.


If you are wondering what happened to the "4" plates, I got a bit carried away and decided that we need at least 20 hors D'oeuvres plates for parties.  And then reality struck and I settled for 12 for myself and two sets of 4 for gifts (I am currently in a holiday gifts making mode).  The first set I had a lot of fun with because I could play with the design a bit.  First I chose the stencil that I thought would look good for the intended recipient.
I then took some of my pretty sharpies and got to coloring.
See how much prettier this is than regular black sharpie?
I did four plates with different bloom colors.
After coloring, I placed them in my oven at 350 degrees for 30 minutes.  While I was waiting for these plates to finish I started on my other plates.  This design was repeated on all 4 plates.
The two sets of 4 above are my gifts to people while the next design I loved so much I am keeping for myself.  At first I wanted to do the design in silver to match my china, thus the 12 dishes I am keeping for myself.
As you can see the silver is not looking too good, so I switched it up to black.
It does look a lot better with the black and this design and much better than the cursive "L" that I tried.  The stencils worked great and I love all the different combinations I can create with the colored sharpies.  They also work great as an inexpensive gift for holidays, birthdays, hostess gifts, etc.


Happy Crafting!
Molly

Knife Block Redo

This is another project that I came across on Pinterest, I swear that site is like crack and I used to play mmorpgs.  This one was pretty easy and quick to do.  Just take your ordinary knife block and paint it, any color.  Here is my standard knife block before.

Don't mind the board it is on, it is my protection for the dinning room table.  Workbench is almost finished, yippee!  I chose one of the sample colors that we have on hand.  It is the same blue that we used in Liam's room.  I it is called Redstone Guest Blue, by Valspar.  We use only Valspar because it works the best for us.  I am sure that any paint will do.
Here are the after shots, like I said pretty easy.  The only difference is that I did not add a monogram or other decal to the block.  I thought that it looked better without one.
And here is the shot with the knives in it.  One of the shears is in the dishwasher at the time the picture was taken.
Since the kitchen is painted a darker blue, I thought that this lighter tone would look good.  Very easy and a quick update to the kitchen.

Happy crafting!
Molly


Finally able to take a breath.

So this Labor Day weekend also happens to be our wedding anniversary weekend.  This year is a big one considering that Josh is actually in the country this year.  Normally we would pack up the dog and head out to the ocean, but this year with the new house we are staying put and doing projects...too many to count to get ready to show off the house during a family BBQ this weekend.  Now that the garage has been cleared out (YEA!) Josh is currently down in the garage; music pumping, power tools grinding, and sawdust flying; making workbenches.  His and hers if you will.  Really looking forward to having a space to do my projects somewhere other than the dining room table.  We also started staining the bathroom vanity with a really great gel stain.  I will be posting those pictures later on when it is all done, as well as the tricks I found to make it stick in one coat.  I spent yesterday ripping out the bushes near the front door of the house, got sick of walking into spiderwebs everyday, and now it looks better.  Although I am trying to convince Josh that we need to expand the front porch out so we can have a bench and potted plants, mostly better curb appeal and sweat equity.  Will be posting pics of that later as well. There are plenty more projects to do with the house before the housewarming party in a few months.  For now I am relaxing whilst the stain dries and updating this blog with a few posting few projects that I have completed while working on the house.  I hope you enjoy them and am sorry for the lapse in postings.  Life has been hectic, but cest la vie. 

Molly

Thursday, August 23, 2012

Seaglass Project

So I saw this project on Pinterest and I thought it looked kind of cool.  I usually tend to stay away from glass projects due to a brother who is a glass artist and puts anyone I know to shame with his artwork.  Yet this was a simple craft that I thought would be fun.  Its very simple, you take glass candlesticks (I bought mine from the dollar store), glue, and food coloring.
You mix the food coloring with the glue to get the colors that you want.  I wanted to try a lilac at first and added a few drops of blue and red until I got the shade I wanted.  I am sure you can do any color imaginable.  Because I am in the holiday present making stage right now I figured I would make them in the colors for the people I had in mind for this project/gifts.

As you can see it is a bit of a deeper lilac, but keep in mind that it will get lighter as it dries.  To paint I used a flat tipped brush and painted on a few coats.

After the candlesticks were painted I let them dry for a few hours.  I liked the project so much that I made two sets.
This could also be a great project for older kids to do for presents during the holiday season.  In total it was $1 per candlestick, $.50 for the glue (you have to love back to school sales), and the food coloring was in my pantry.

Happy Crafting!
Molly


Wednesday, August 22, 2012

Craft Storage Re-do

So a few Christmases ago Josh bought me a white craft storage unit from one of the larger craft store chains.  It has been hidden away with crafting supplies just stuffed into it and then banished to the garage when we moved.  After seeing that I would have to wait a few more weeks before having my crafting haven downstairs, I decided to give it a little pizazz with the contact paper that I bought and some paint.

Here is the before.  I do like the color white, but as an accent.  This was a bit too boring.

First I dismantled the storage cube.
 After I took the cube apart, making sure I marked which screws went where, I laid out all the parts on the table and measured out the contact paper.


I planned on covering the two sides as well as the top of the cube and the front of the storage drawers.  

After laying the contact paper on the larger pieces, I smoothed out all the air bubbles that popped up.  I also made sure to measure out enough contact paper so that I could overlap along the edges so that when it was screwed back together the paper would stay.  Once again, this is contact paper that I bought from the dollar store and I want to make sure that it will stay put.


After the three larger pieces were covered I stared to reassemble the cube.


 Once the cube was put back together it was time to also do the front of the drawers.  At Josh's suggestion I chose to paint the front of the drawers instead of placing the contact paper on them.


Once the paint was dry I reattached the pulls, and reattached the drawer fronts.


Here is the finished storage cube.


As you can see it looks much better.  All it took was some paint and contact paper.  If it wasn't for a whirlwind of chaos named Liam, I would keep this out all the time.  Now I am really looking forward to creating my crafting haven as soon as we get most of the garage cleaned out.


Happy crafting,
Molly